Use Firebase remote config with your React App


The firebase docs defines remote config as "Firebase Remote Config is a cloud service that lets you change the behavior and appearance of your app without requiring users to download an app update". This basically means you can control the appearance of your app from the cloud. Incase of this example which is going to be a React web app, we will be able to change certain aspects using the cloud. This would mean we can change/ configure the UI of our website without having to manually changing and deploying a new production build every time. Say for example, you have a particular greet tab which say wishes your user based on a national holiday of that country. Now I may use a few if statements and javascript to manipulate that, but it would mean a lot of hardcoding. And say, I ship my product before Independence Day of India. Now I may keep a tricolored "Hello" header in my website. But I would not want that to be displayed to someone in UK right? Also, say after Independence day, I would want to remove that style. But that would mean again shipping a new production build. Here's where remote config comes into play. With a few simple steps and the power of Firebase, we will be able to achieve this seamlessly. Let's get to it
- Let's create a React App first. Open up the terminal and use this command. We are keeping the name of our app remote-config, but you can use whatever you want.
npx create-react-app remote-config Move into the project folder.
cd remote-configLet's clean up the predefined templates. Delete the following files
- reportWebVitals
- setupTests.js
- logo.svg
- App.test.js
These are primarily the test files and icon image. If you want you can keep them. I prefer to use these later on.
Now let's get started with our firebase integration. Go to console.firebase.google.com and login/signup to get access to the console. Once done, you should see the following page.
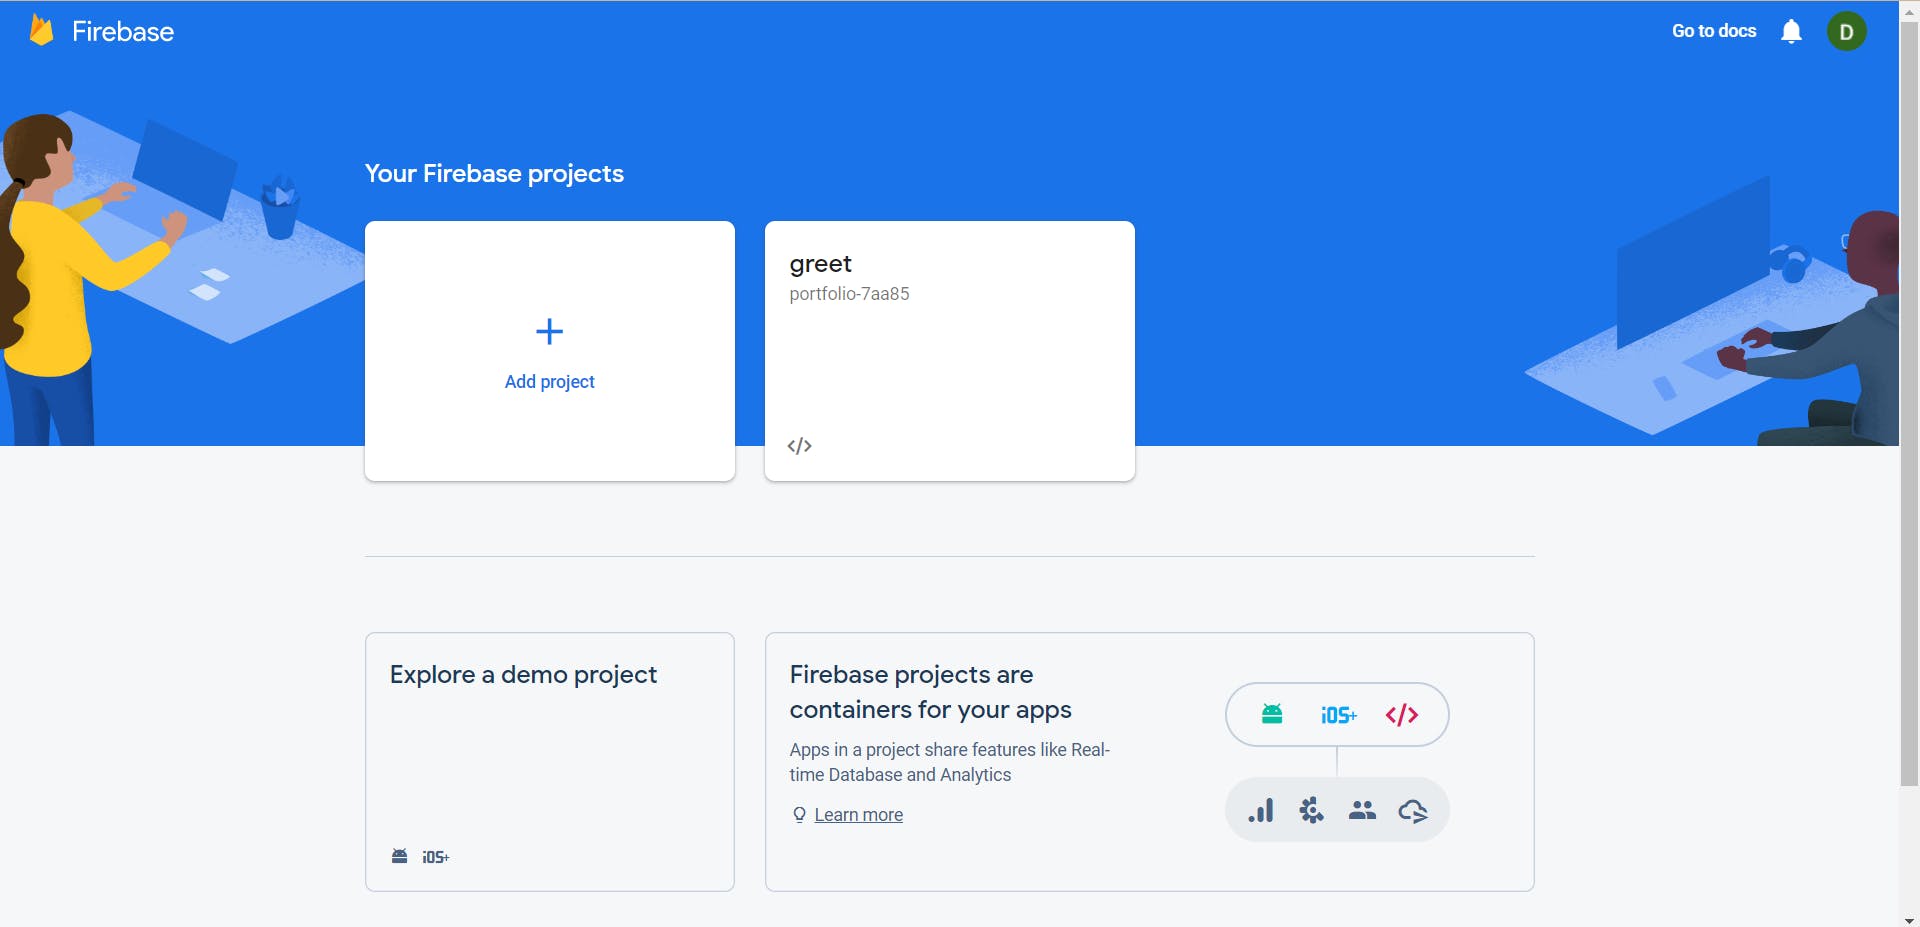 Don't worry about the card greet since that is a personal project!
- Now click on Add Project. Fill in the project name. We'll keep it React Remote Config.
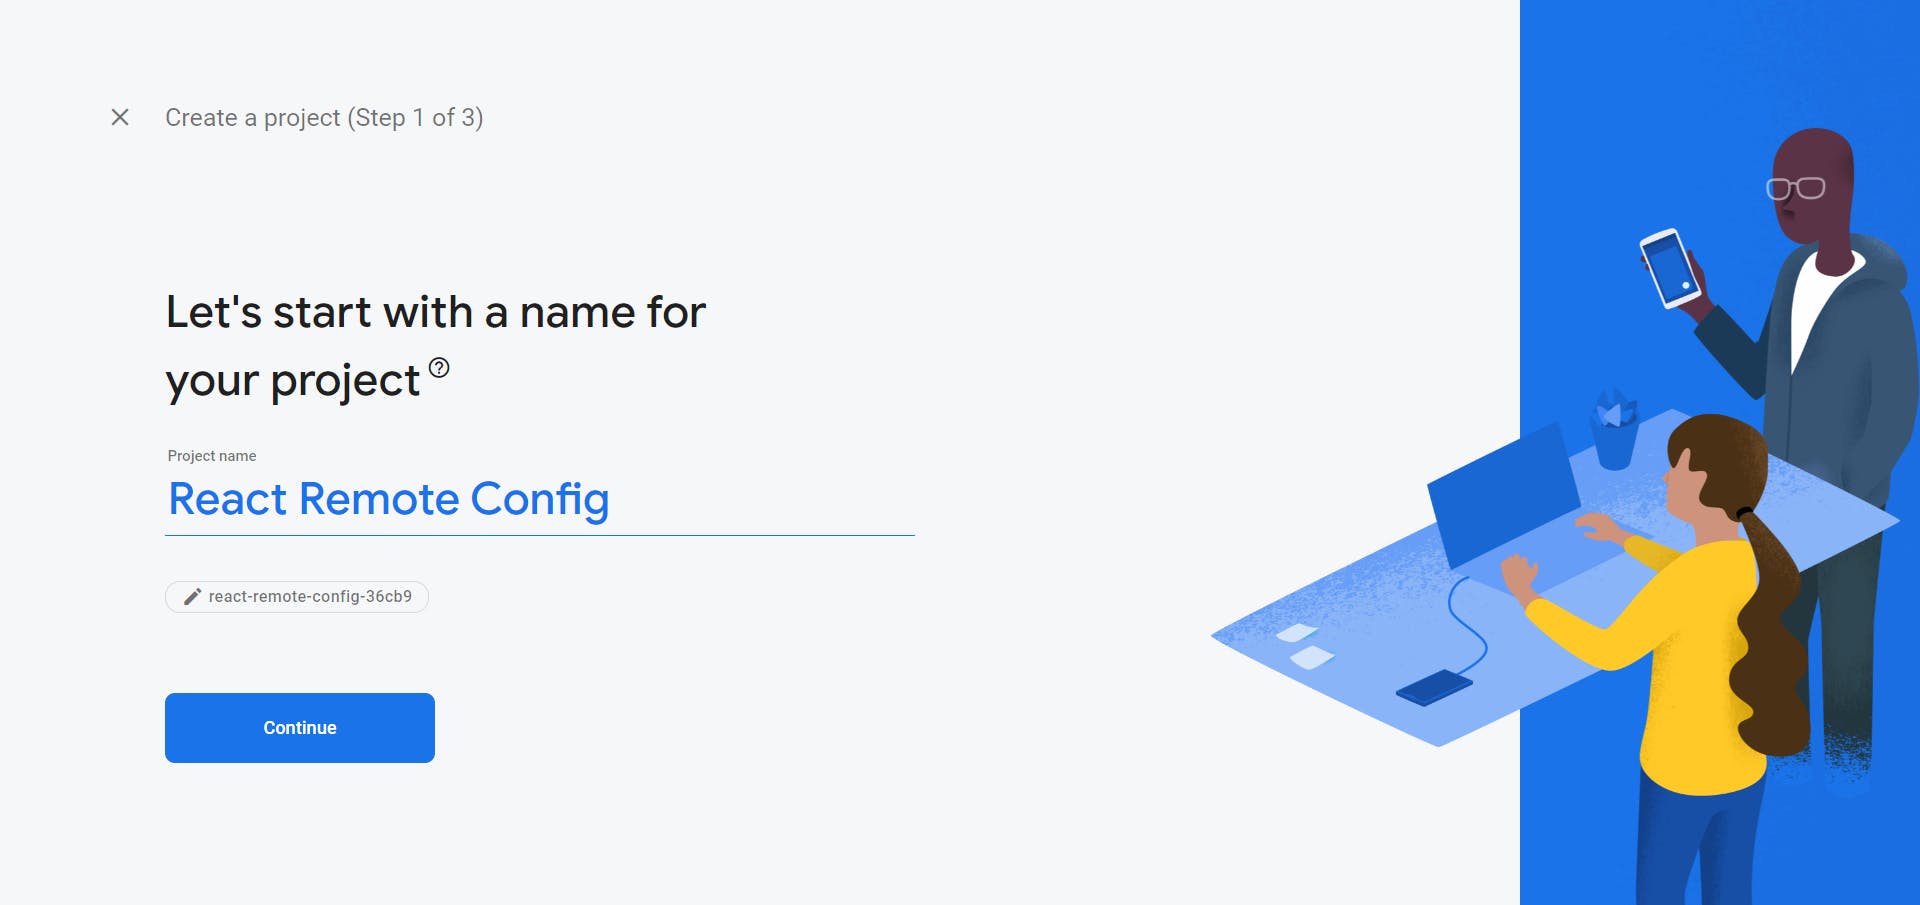 Click on Continue.
 - Disable "Enable Google Analytics for this project" and click on Create Project. Wait for firebase to set up your project.

- Once set, you should see the following page.
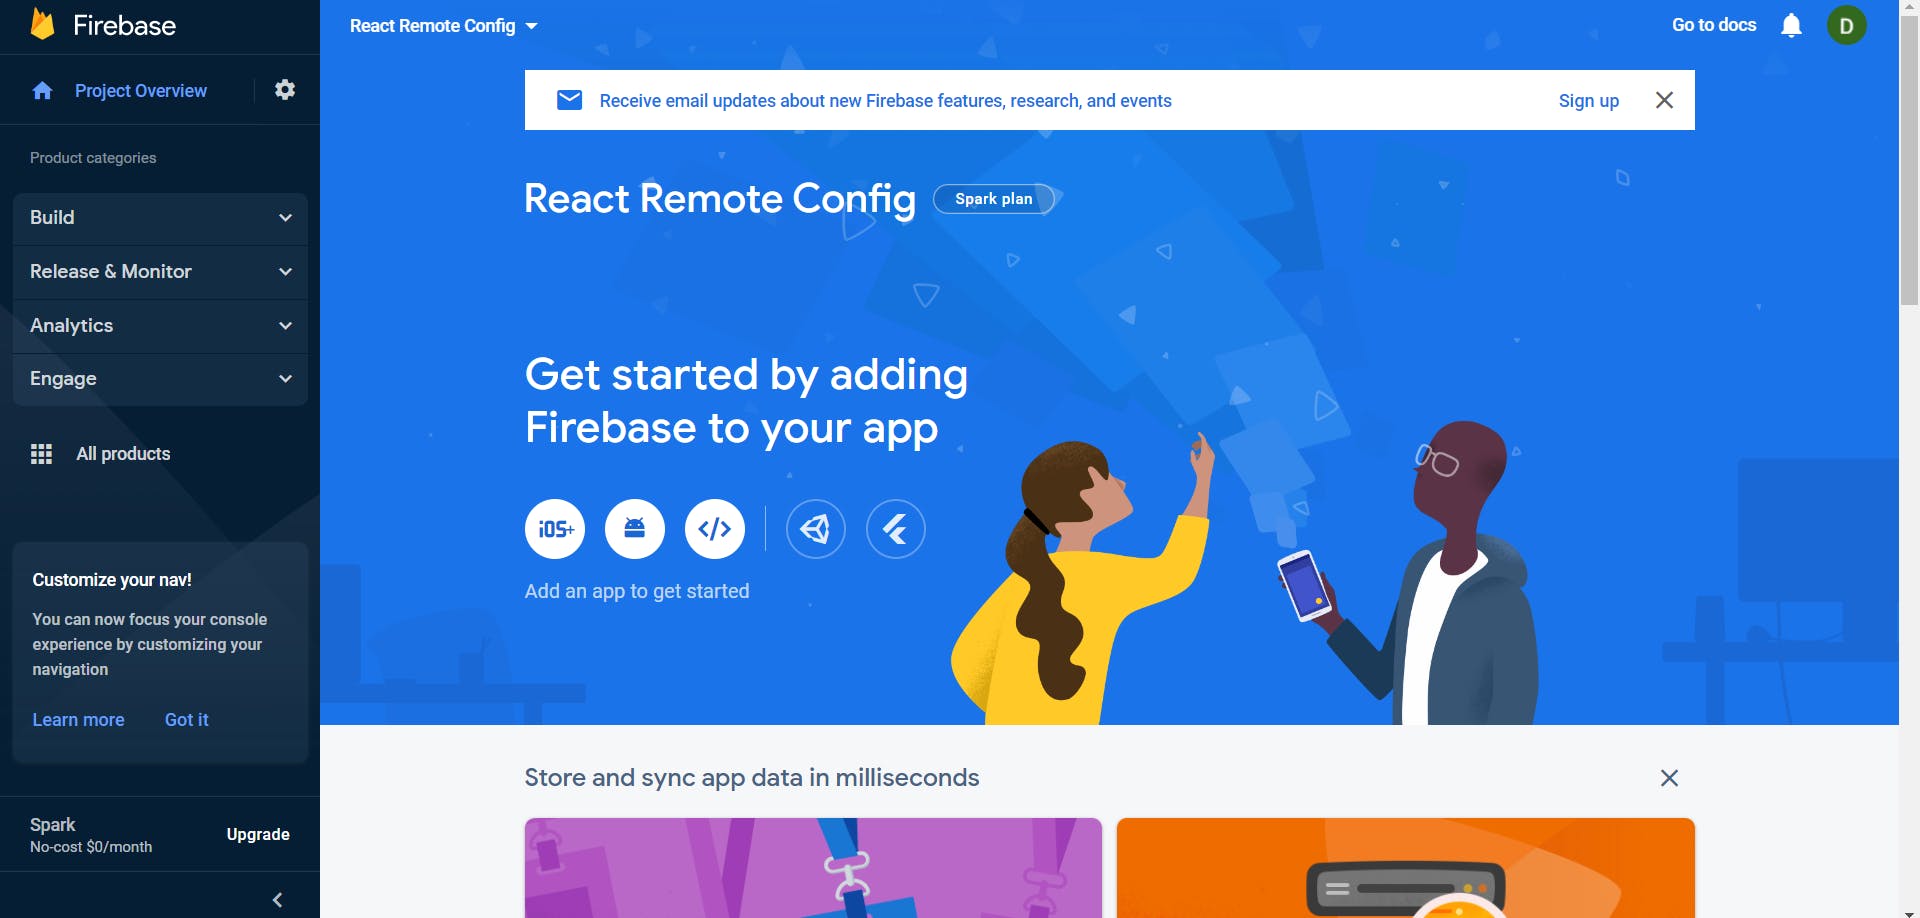 As you can see firebase can be integrated with Android, IOS, Web, Flutter and Unity projects. Since we are going to be using React, we'll select Web.
 - On the next page, we'll give a nickname to our app. Let's go with react-remote-config. Then click Register app. After this is done, you'll get a code snippet with a firebaseConfig which is your firebase configuration which we would be using with our React project. It should look something like this.
const firebaseConfig = {
  apiKey: "Something",
  authDomain: "Something",
  projectId: "Something",
  storageBucket: "Something",
  messagingSenderId: "Something",
  appId: "Something"
}
This means our firebase project is set. Keep the entire code snippet for now. We'll later add this to our React Project.
Till here it was simple setting up projects on either end. Now let's begin with remote config. Our React App is going to be simple. It will just show a text saying 'Hello! This is an example of firebase remote config'. But we'll change the word Hello based on the users' location. If our user is from India, we'll display Namaste! This is an example of firebase remote config. Namaste is just hello in Hindi. Oh yeah! Namaste to anyone reading this blog! First we'll do a bit of frontend. Let's create a component that will simply display a message "Hello! This is an example of firebase remote config".
So first create a new folder named Components inside src on our React app folder. Following that create a sub folder inside Components named Main. Now within Main create a file called Main.js (Caps is required!). Here's how the final folder structure should look.

Now let's edit our Main.js. It is simply going to be a component returning the message line. But lets tweak it a bit. Since we know we are going to play around with "Hello", why not tweak it with props. So use props and return a p tag with the props.greet instead of Hello. Now I could have done this directly in App.js instead of creating a new component all together (and that makes more sense) but I am doing this just to show how React components can be used! So, here's how the code should look like
export default function Main(props) {
 console.log(props)
return (
   <p>{`${props.greet}`}! This is an example of firebase remote config.</p>
)
}
Alright then, we'll later see what to do with the frontend part. Let's first configure our remote config. Time to head back to our Firebase Console.
- Click on Remote Config from the Build Menu.
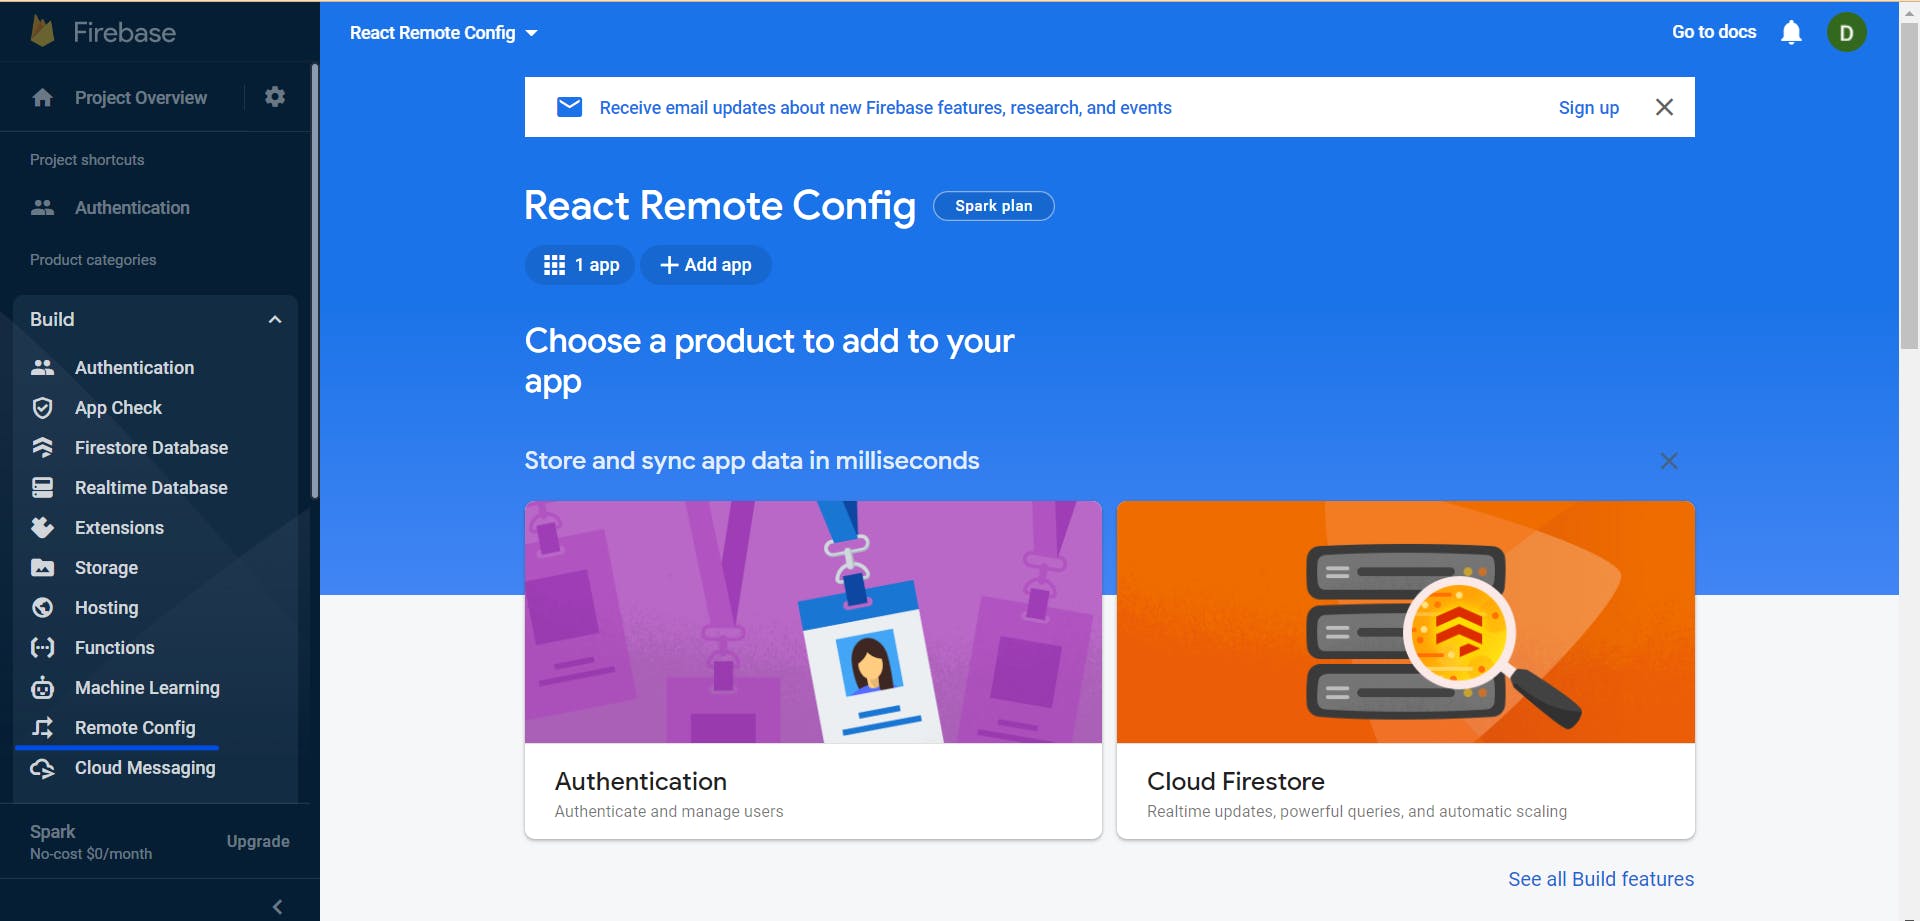 The remote config console should look like this.
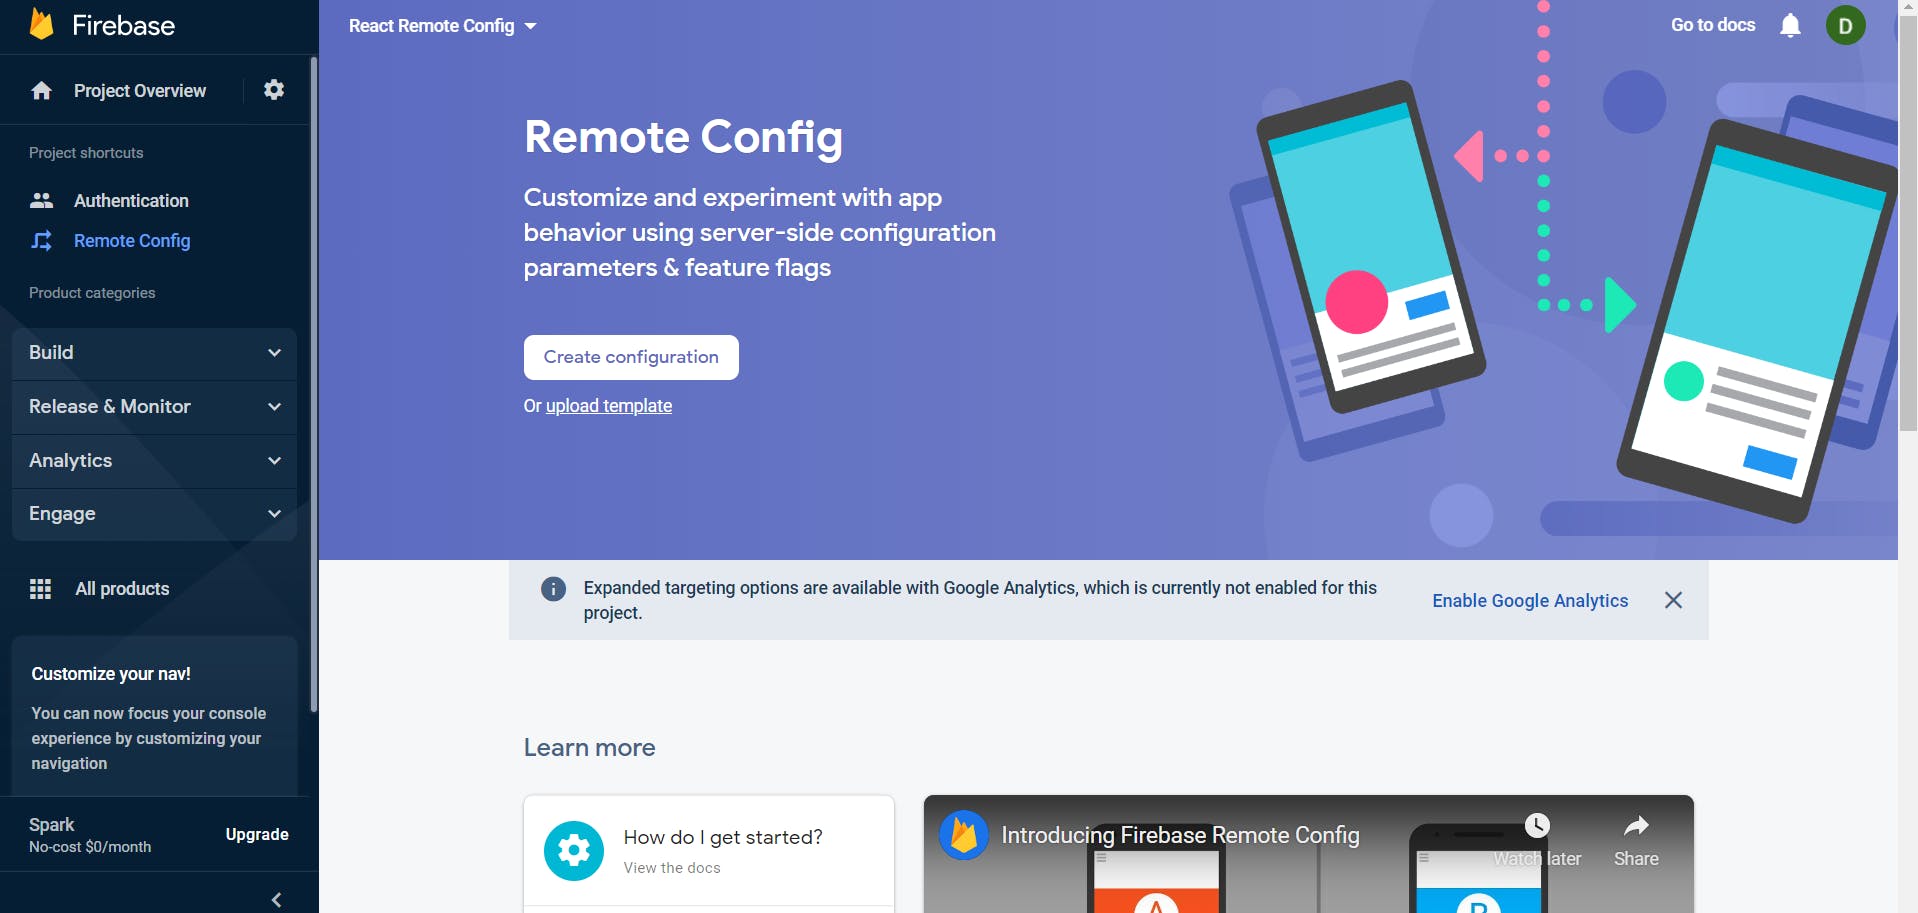 Click on Create configuration. A side panel should open up. Let's get into it now.
4.
Click on Create configuration. A side panel should open up. Let's get into it now.
4.
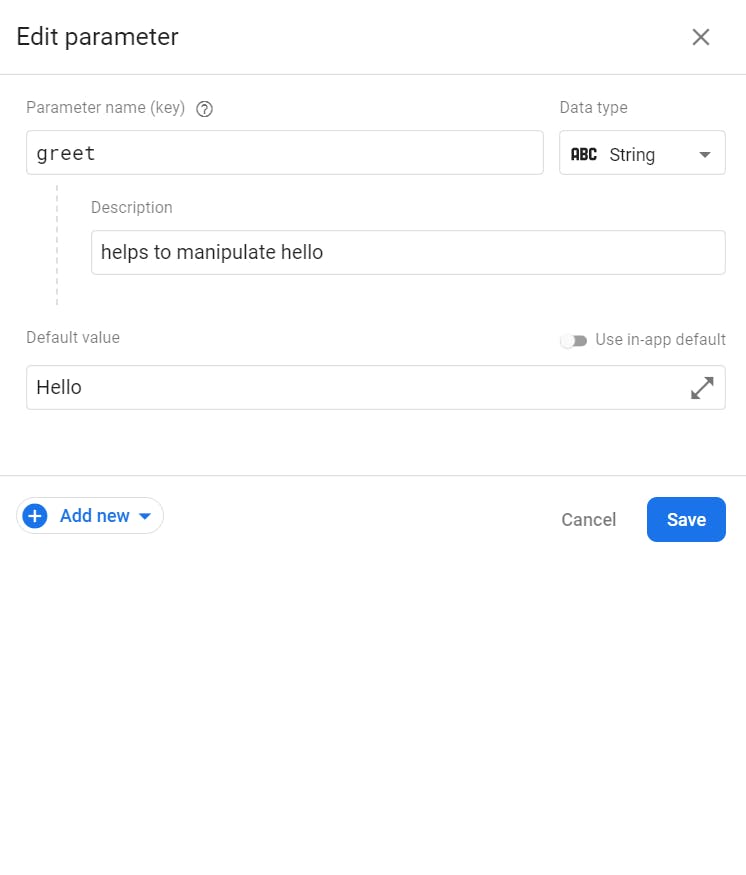
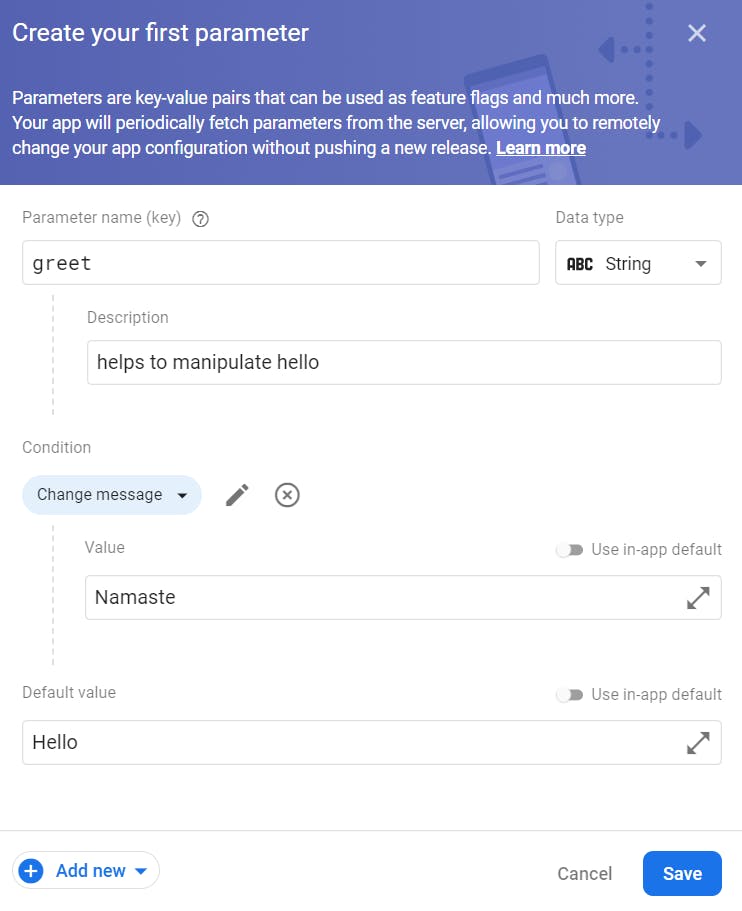
 Here, you can see something called Parameter name. This is that key that is going to identify our attribute that we want. We'll name this greet. So now Firebase will know we have something called greet and that is what we'll use when calling from our client side code. The data type for greet in our case is string. We can set it to other data types too as required.
There is something called description. It's like meta data for the parameter. Let's say we'll keep it "helps to manipulate hello". Now what it needs is a default value. So, we'll keep it Hello. I'll get to its importance in the next step.
Here's how everything should look like.
Here, you can see something called Parameter name. This is that key that is going to identify our attribute that we want. We'll name this greet. So now Firebase will know we have something called greet and that is what we'll use when calling from our client side code. The data type for greet in our case is string. We can set it to other data types too as required.
There is something called description. It's like meta data for the parameter. Let's say we'll keep it "helps to manipulate hello". Now what it needs is a default value. So, we'll keep it Hello. I'll get to its importance in the next step.
Here's how everything should look like.
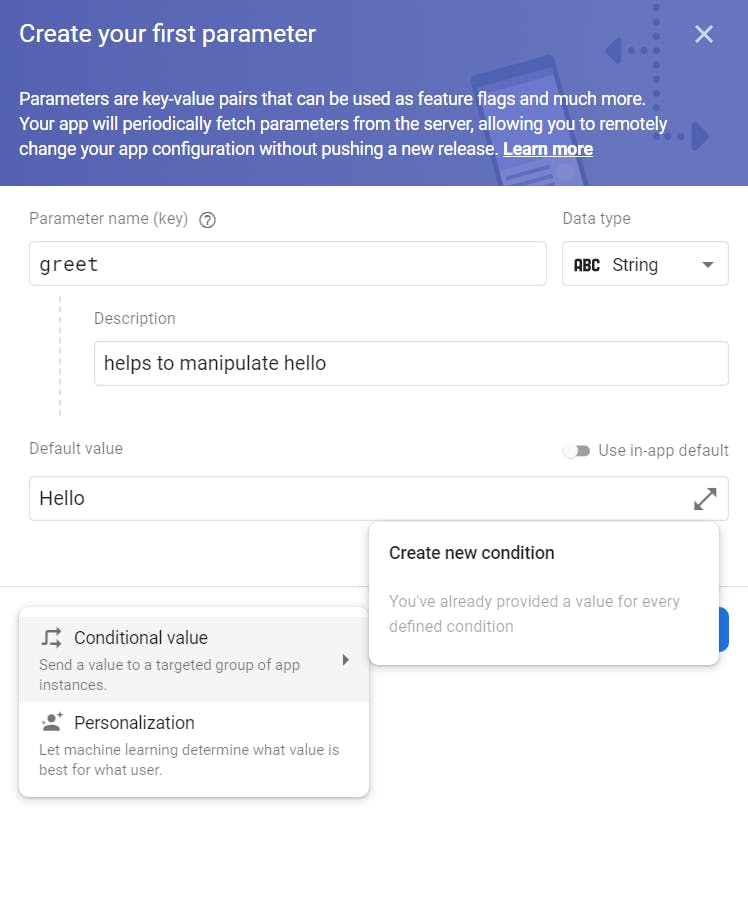
- Click on Add new and then hover over conditional value. You can see something called Create New Condition. Let's click that.
 From the new modal that pops up, write a condition name, let's say Change message. Following that we will select Country/Region and India. It should look something like this.
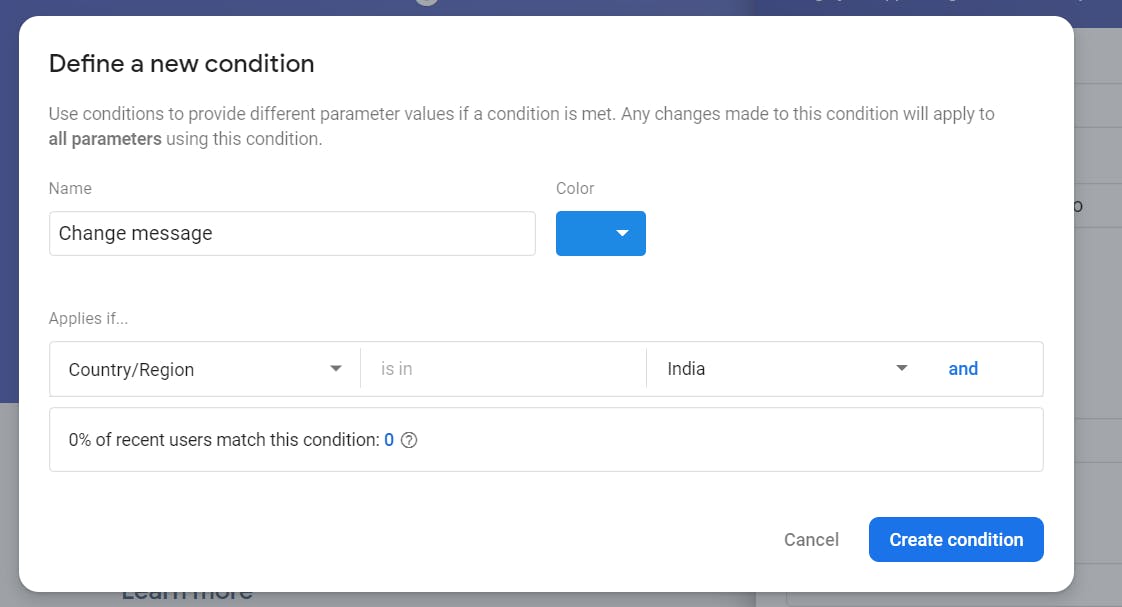 Click on create condition to proceed. What we did here was just create a condition that would work only if our user is from India. You can see there were a lot of other options. Explore them too!
 - Now we will add Namaste to the value of the condition and click Save! And then click on Publish Changes. That's it! We have configured firebase to send Namaste incase if request is from India else it'll send Hello. Remember I said about the default value? Well that is what firebase sends incase of non-condition match! Quite like the default of a switch-case statement.
- Now back to our React App. Here we will first install firebase using npm.
npm i firebase - Next we will import a few stuffs from firebase and add the firebase config to our App.js.
import { initializeApp } from "firebase/app"; import { activate, fetchAndActivate, fetchConfig, getRemoteConfig, getValue } from "firebase/remote-config"; //Add config here const firebaseConfig = { }; - Now inside of the App function let's use firebase.
const app = initializeApp(firebaseConfig); const remoteConfig = getRemoteConfig(app);const [greet, setGreet] = React.useState(""); - Great! Now is the time to get the value of greet. Now since we are going to call firebase, think of it like an api call. So we'll be doing this inside a useEffect hook.
useEffect(() => { let greeting = ''; fetchAndActivate(remoteConfig) .then(() => { console.log('Fetched remote config'); greeting = getValue(remoteConfig, 'greetings'); setGreet(greeting._value); }) .catch((err) => { console.log("Failed to fetch remote config", err); }); }, []); - Now firebase usually limits call to your remote config to 12 hours. So it in turn may use browser cache. Now if you are developing, you would obviously want to test it more frequently. To that we'll use remoteConfig.settings.minimumFetchIntervalMillis and set it to 0. This way we'll get the values every time we need it without any time restriction.
remoteConfig.settings.minimumFetchIntervalMillis = 0; - Now as a last part, the App function will return the Main component. But remember to send greet as a prop.
<Main greet={ greet } />
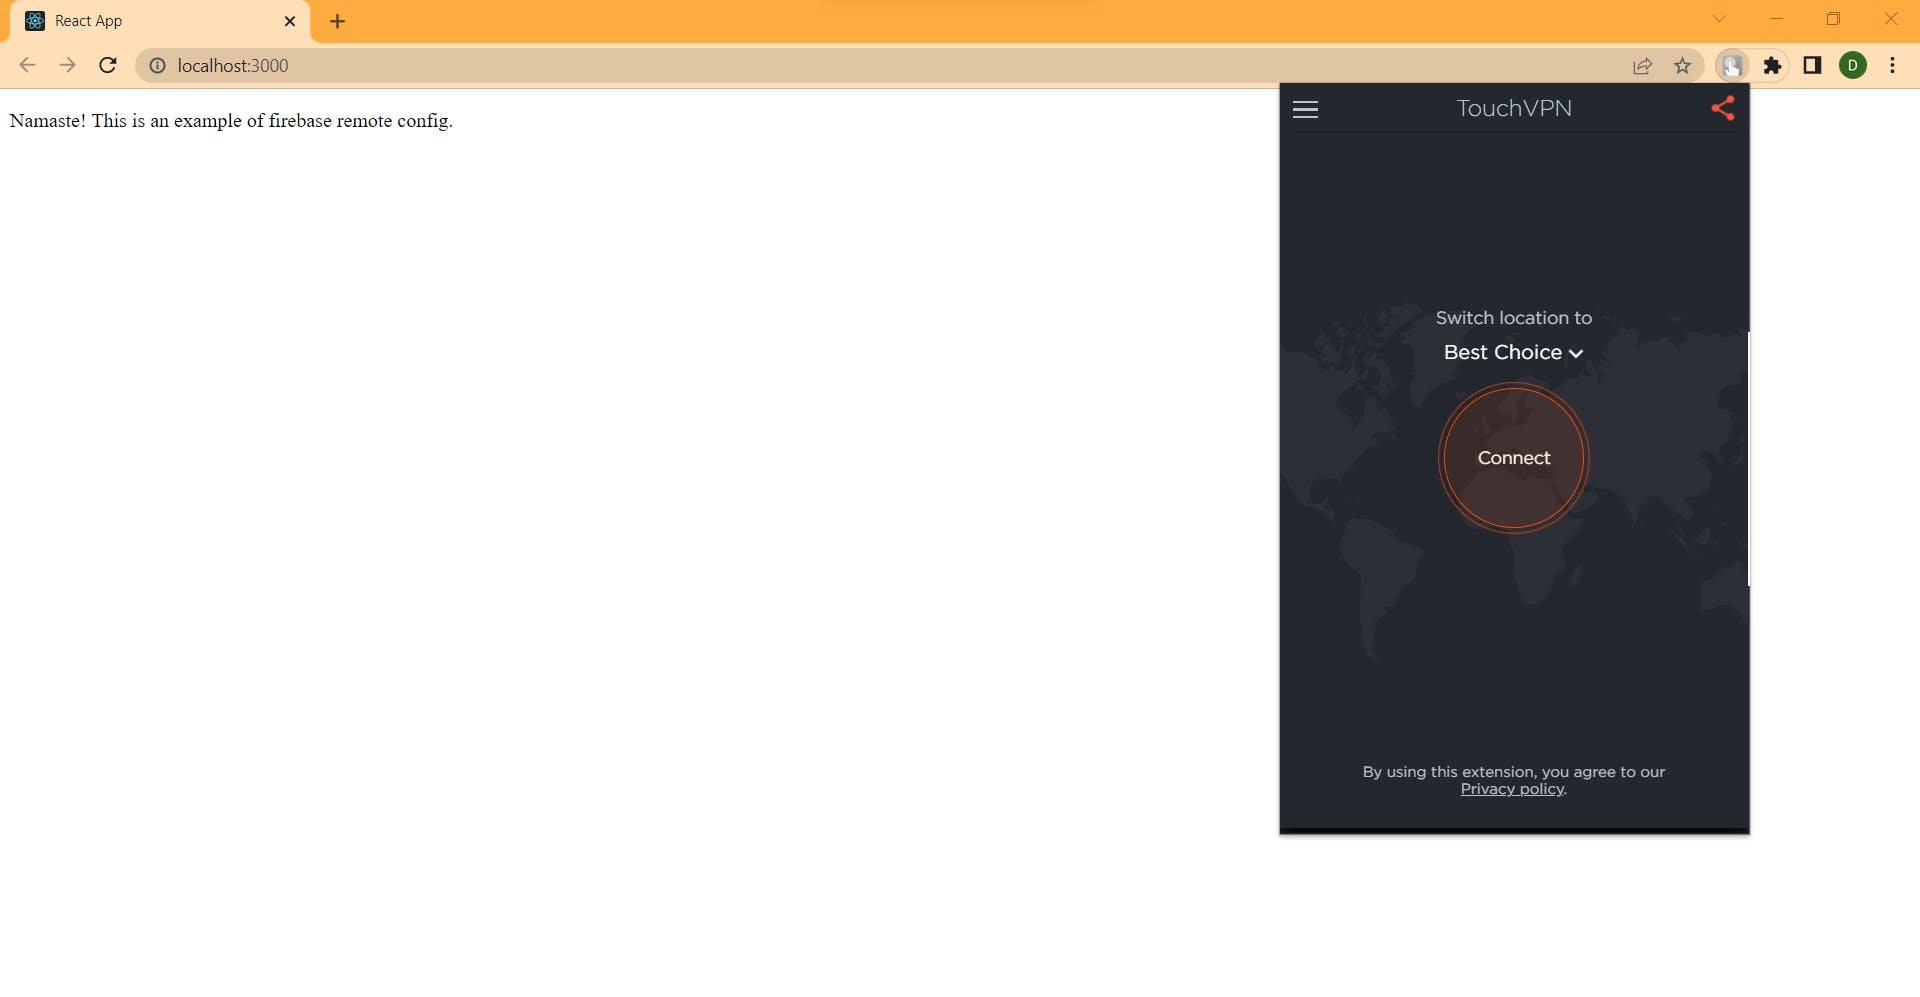 When in India
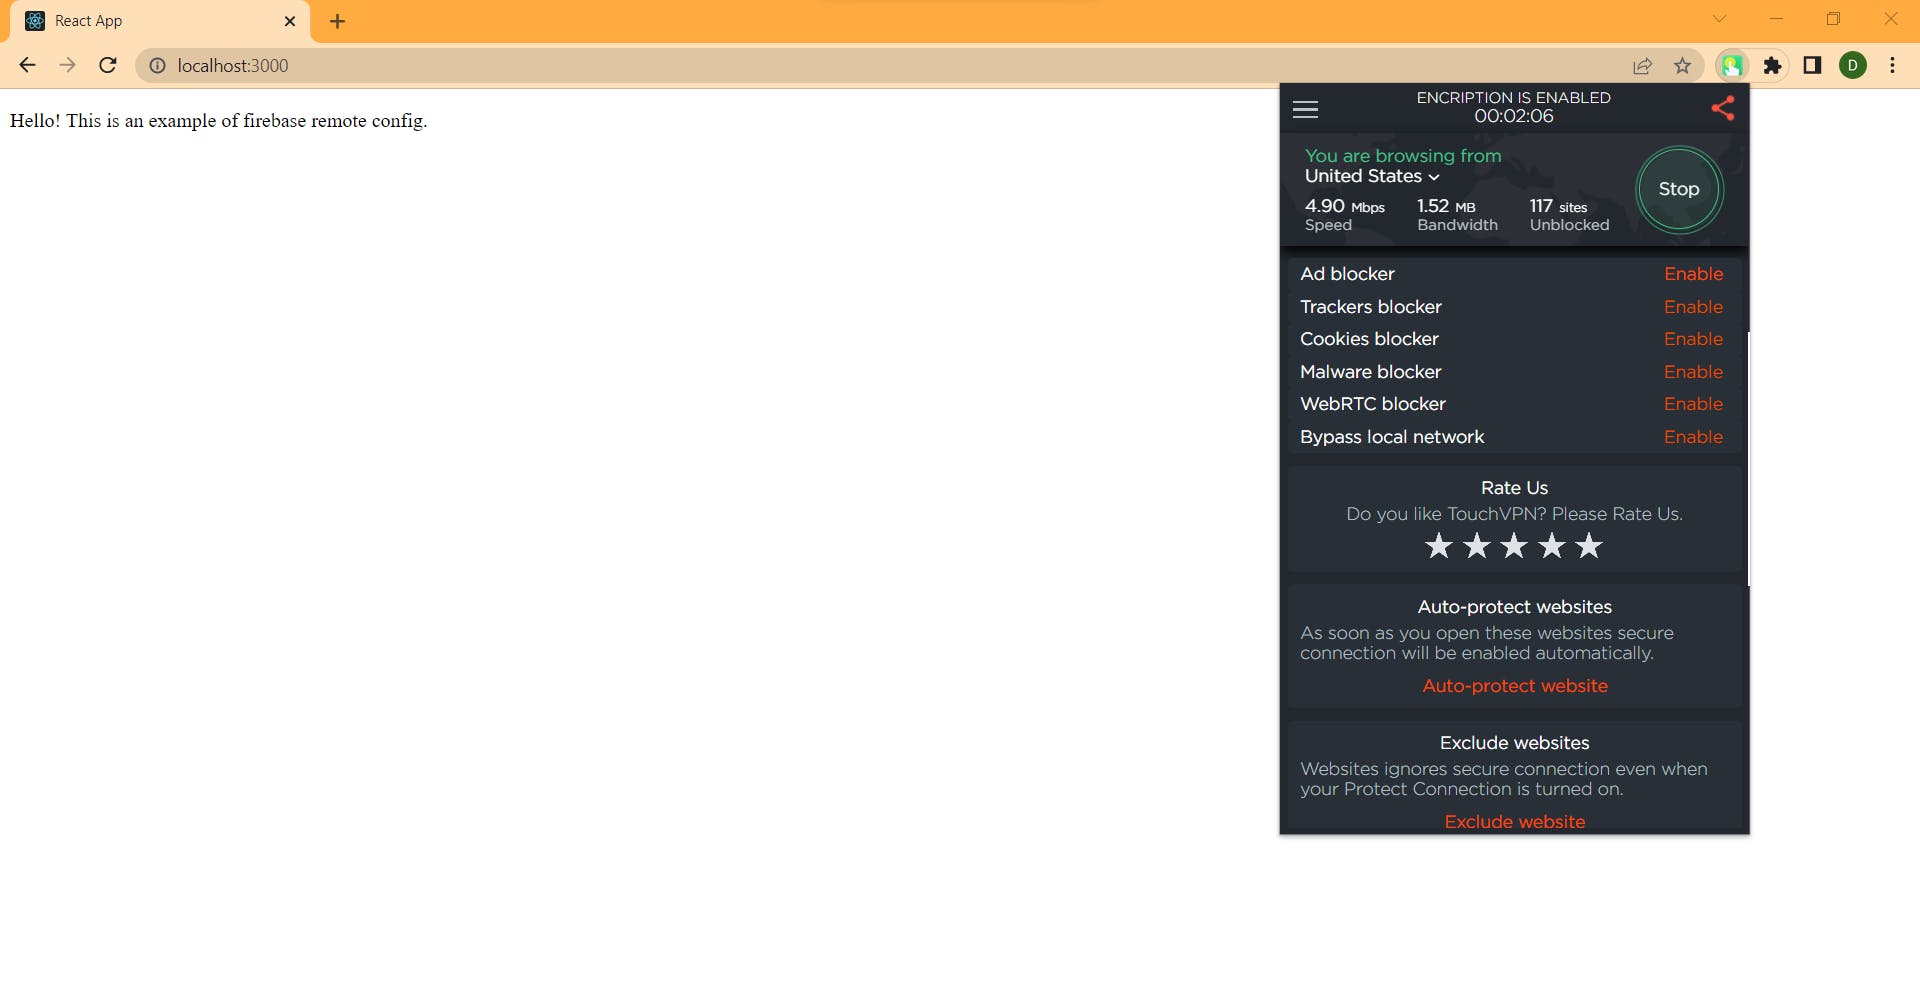 When in United States Of America
So here is how you can use remote config for personalizing the UI/UX of your app. Here is a reference to the docs Also a very big thank you to Sahil Kalyani Sir whose talk on UI/UX personalization at GDG Cloud Kolkata's Cloud Community Days 2022 taught me about this feature of firebase and inspired me to write a blog about it. You can find the entire code on my Github here. Do connect with me on twitter and LinkedIn! Thank You for reading this!